Knowledge Base
- Home
- Knowledge Base
How to Registration Licence Hikvision Server on HikCentral Professional

Step 1: Open HikCentral Professional Web Client.
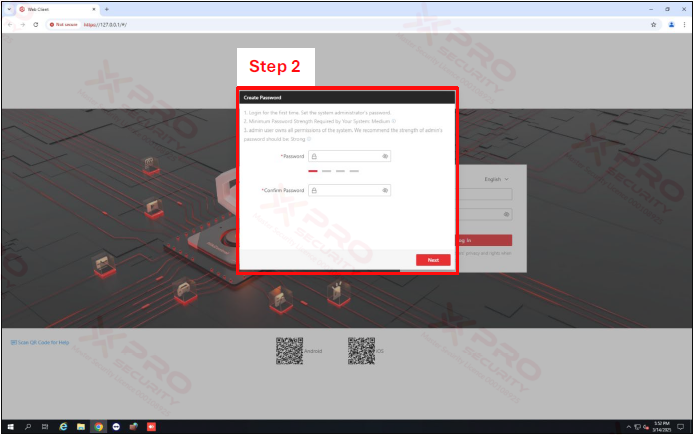
Step 2: You will be asked to create a password for the super admin, but before that, you must first open CMD to find out the IP of the Hikvision Server.
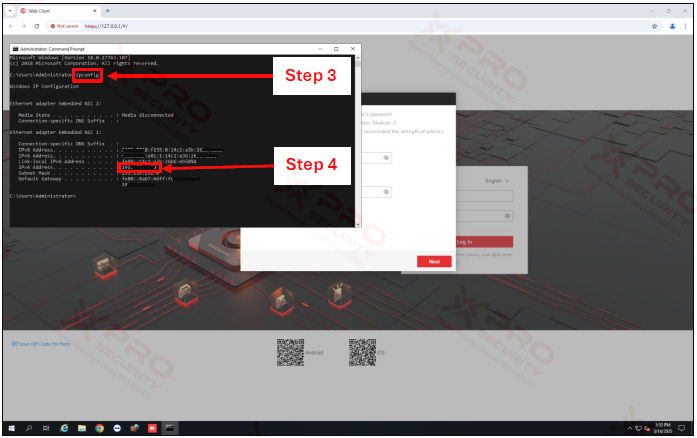
Step 3: Write “ipconfig” on CMD.
Step 4: Note the Hikvision Server IP Address.
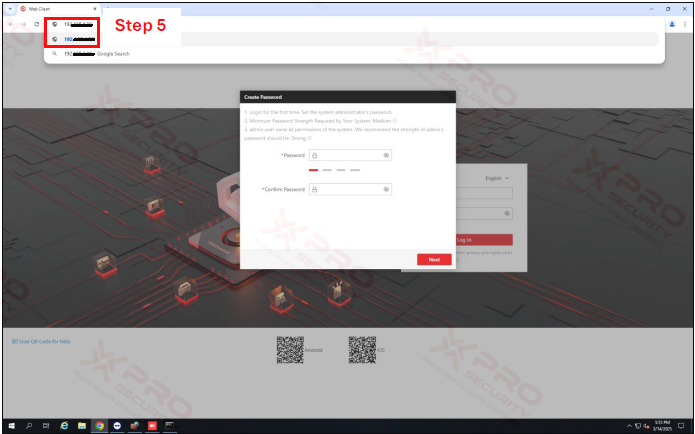
Step 5: Enter the IP address in the browser search field and click Enter.
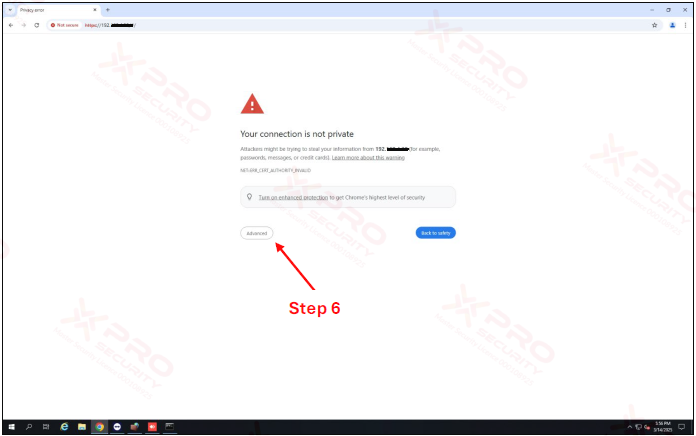
Step 6: Click “Advanced”.
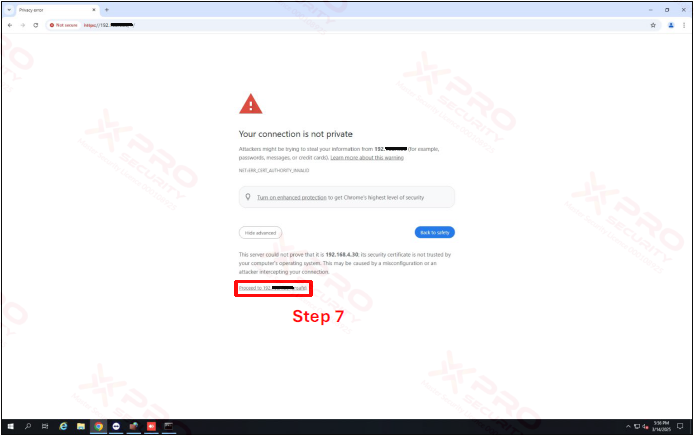
Step 7: Click “Proceed to xxx.xxx.xxx.xxx (unsafe)”.
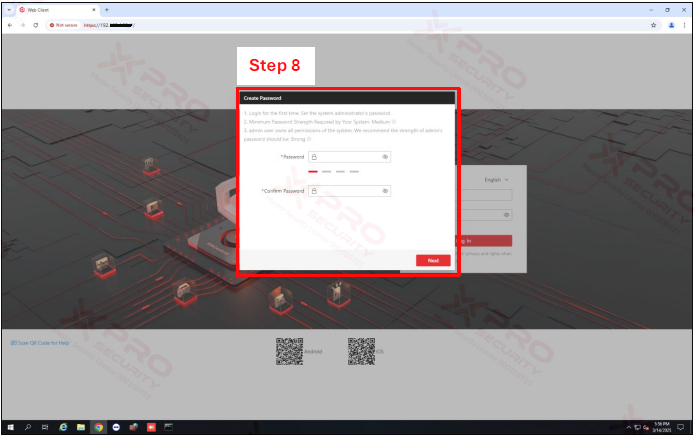
Step 8: Create a password and repeat it, click “Next”.
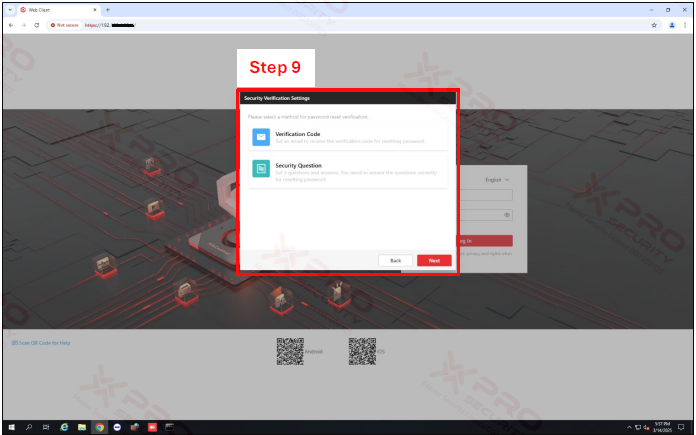
Step 9: Select security verification. This time, we will give an example for “Security Question” and click “Next”.
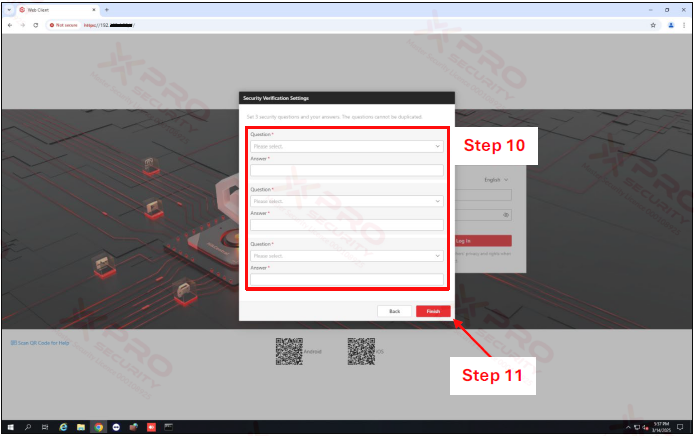
Step 10: Select 3 questions and answer the questions you have selected.
Step 11: Click “Finish”.
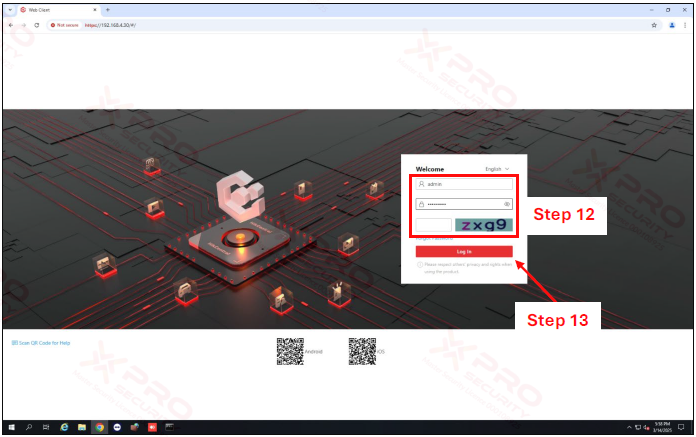
Step 12: Enter username (admin), password, and captcha.
Step 13: Click “Log In”.

Step 14: The license is already active.
Step 15: These are the details of the license.
Step 16: Click “Next”.
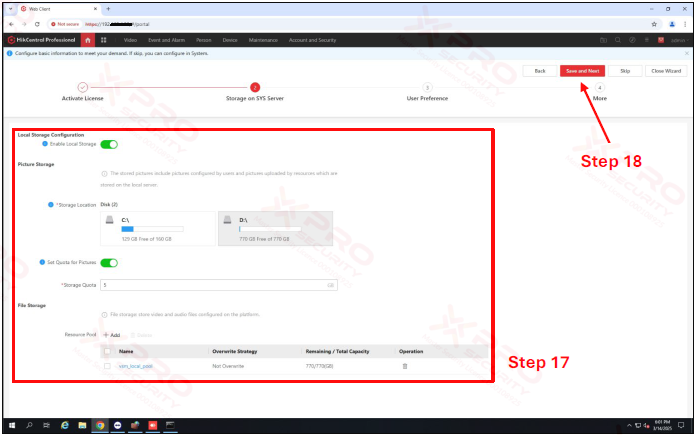
Step 17: Set “Storage on SYS Server”.
Step 18: Click “Save and Next”.
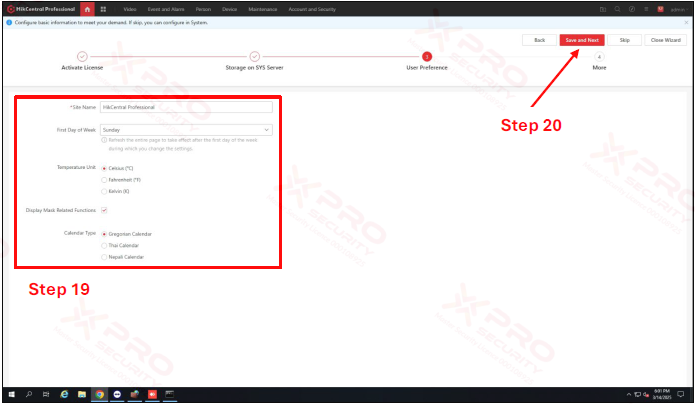
Step 19: Set “User Preference”.
Step 20: Click “Save and Next”.
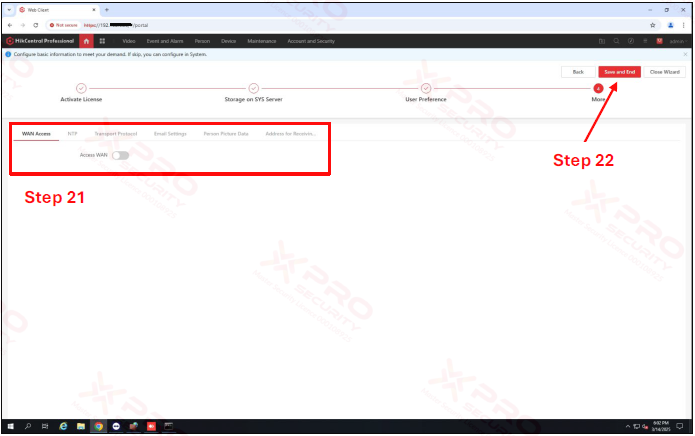
Step 21: Set other settings. But if you are confused about setting it, you can skip it first because all these settings can be set and changed again.
Step 22: Click “Save and End”.
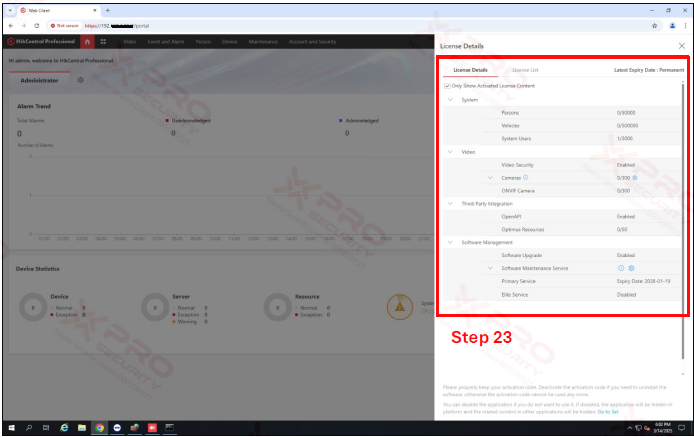
Step 23: The activation process is complete. On this panel, you can see the license details again.

Step 24: Open “HikCentral Professional Control Client”.
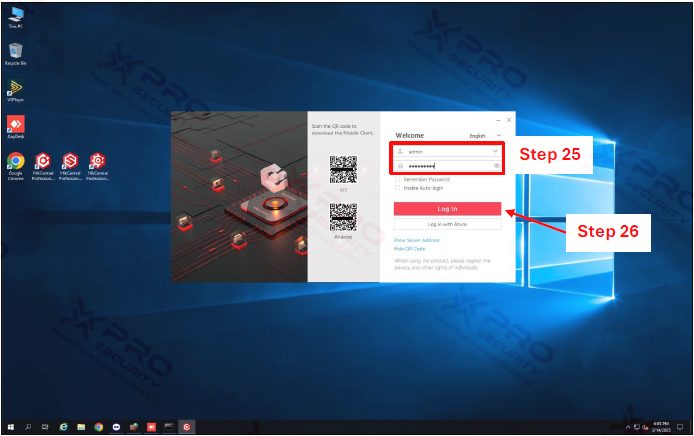
Step 25: Enter the username (admin) and password that you created on the HikCentral Professional Web Client previously.
Step 26: Click “Log In”.
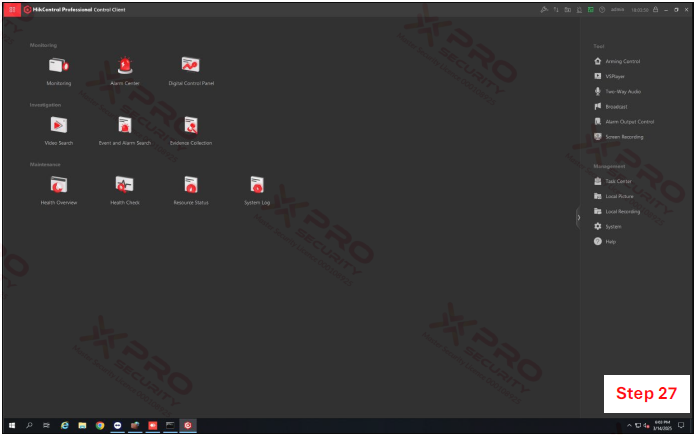
Step 27: You have successfully logged in to HikCentral Professional Control Client with the account you created.
Contact Us Today For A Quote

Copyright © 2024 Xpro Group Pty Ltd TA/S Xpro Security