Knowledge Base
- Home
- Knowledge Base
How to Create Scene on Project Design Tool Application
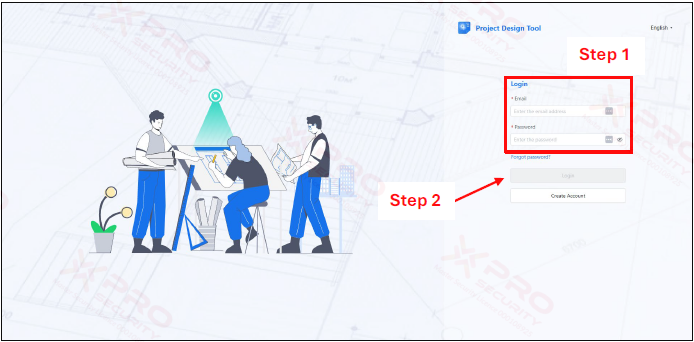
Step 1: Enter your e-mail address and password.
Step 2: Click on “Login”.
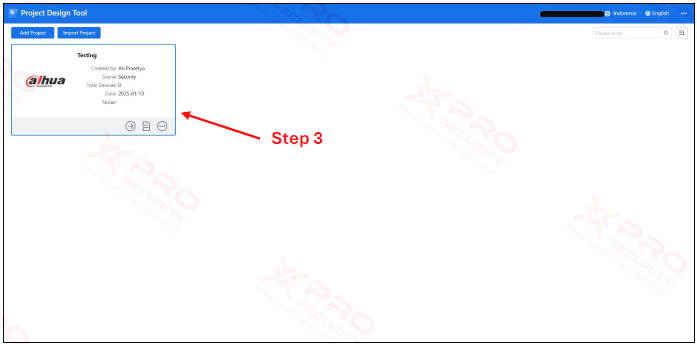
Step 3: Click on the project you have. If you don't have a project, you can add one by clicking the "Add Project" button.
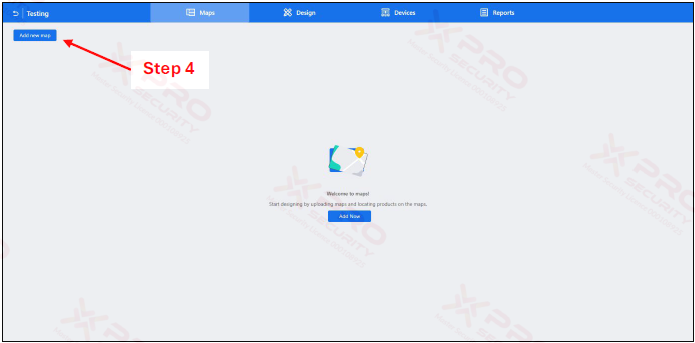
Step 4: Click on “Add new map”.
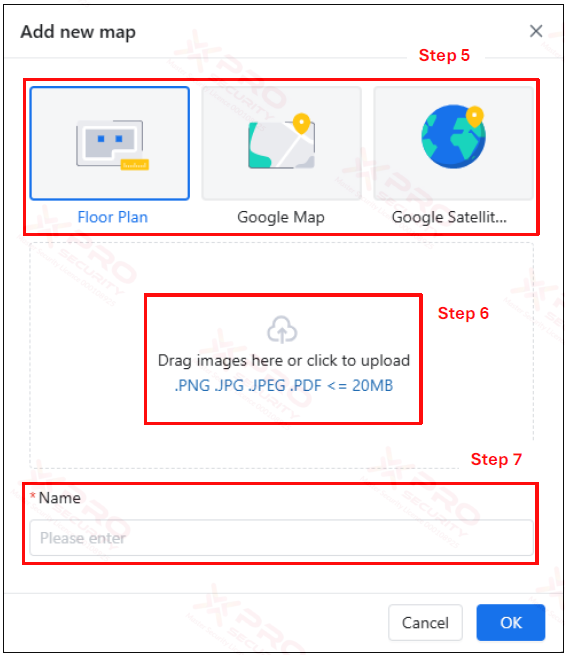
Step 5: You can choose between a floor plan, Google Maps, or Google Satellite. A floor plan is typically used to design indoor spaces, while Google Maps and Google Satellite are used for outdoor spaces.
Step 6: Please click here to upload your indoor design.
Step 7: Enter name.
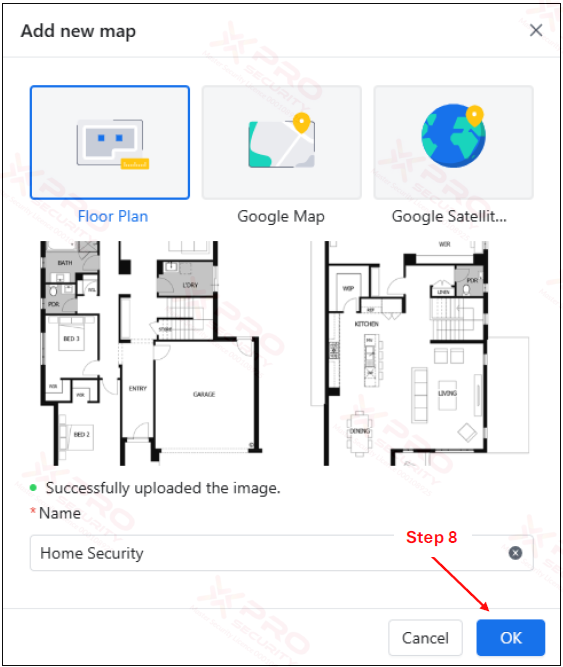
Step 8: Click on “OK”.
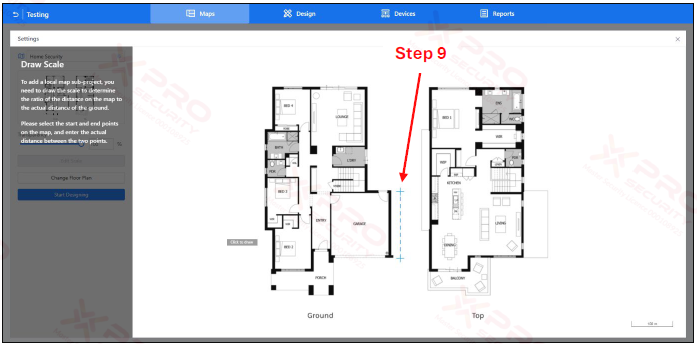
Step 9: Draw the scale to determine the relationship between the distance on the map and the actual distance on the ground.
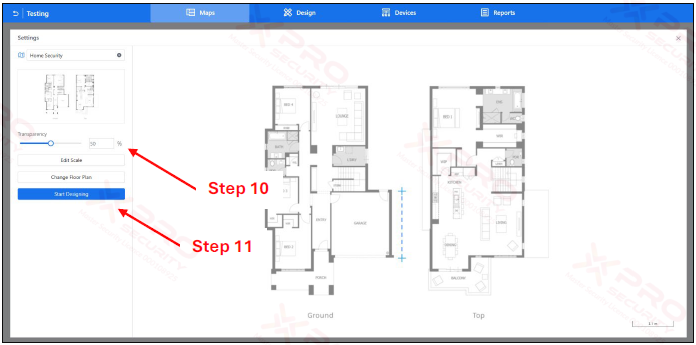
Step 10: Set the transparency of the image.
Step 11: Click on “Start Designing”.
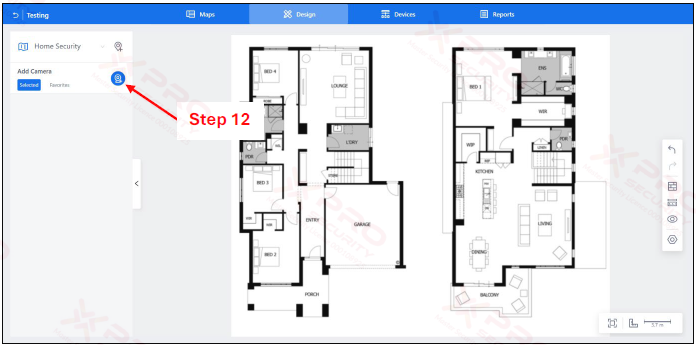
Step 12: To add a camera, click this icon.
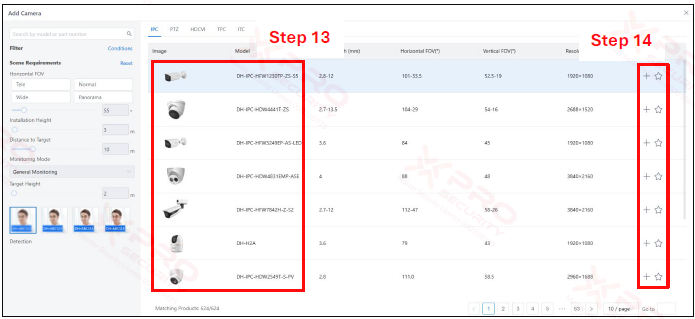
Step 13: Select the desired camera.
Step 14: On the camera section you want, click the "+" icon.
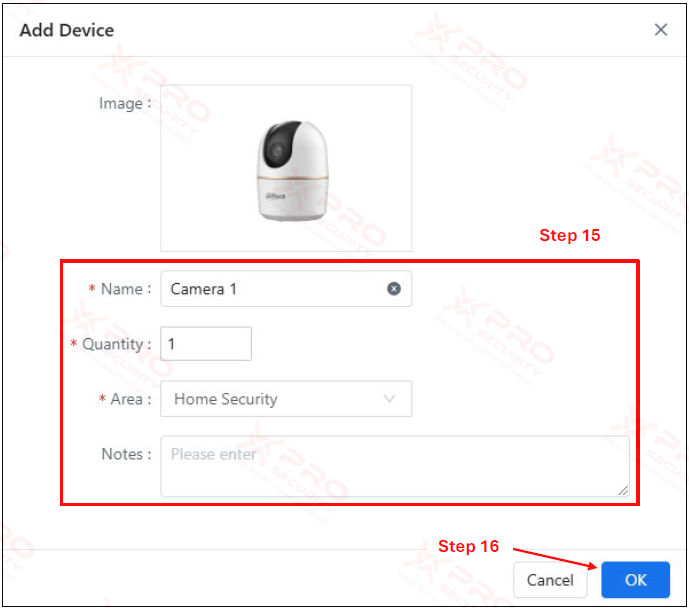
Step 15: Specify name, quantity, area, and note (additional).
Step 16: Click on “OK”.
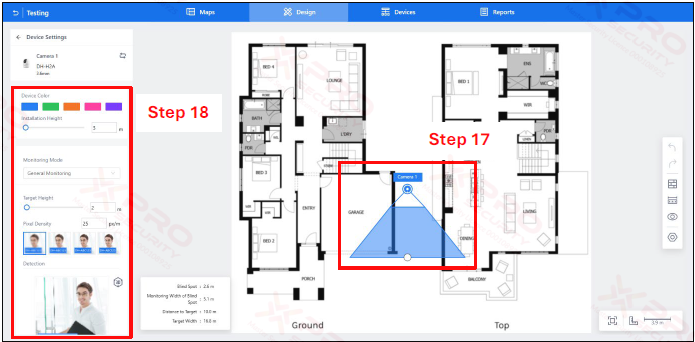
Step 17: Camera added successfully. Now, you can place the camera in the desired location.
Step 18: This panel also allows you to do a bit of camera configuration.
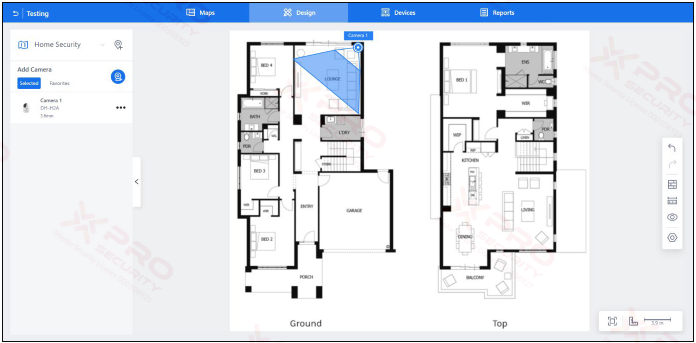
Depending on the number of cameras you want to place, repeat steps 12 through 18.
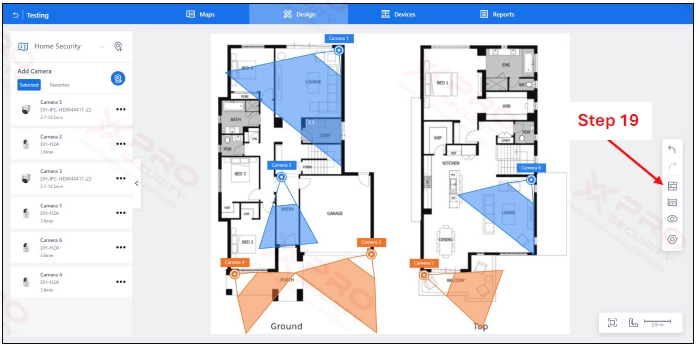
Step 19: For Camera 1 and Camera 3, the camera's line of sight goes through the House Design wall line. To fix this, you can click on the "Wall" logo to add a wall that will limit the camera's line of sight.
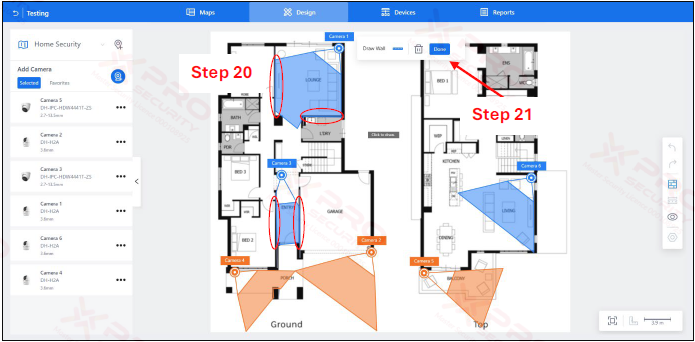
Step 20: Please take a picture of the wall where it overlaps with the wall line on the map and where the camera is looking.
Step 21: Click on “Done”.
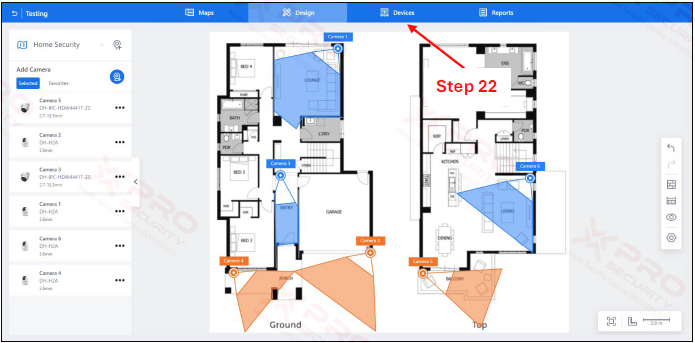
Step 22: Click on “Device”.
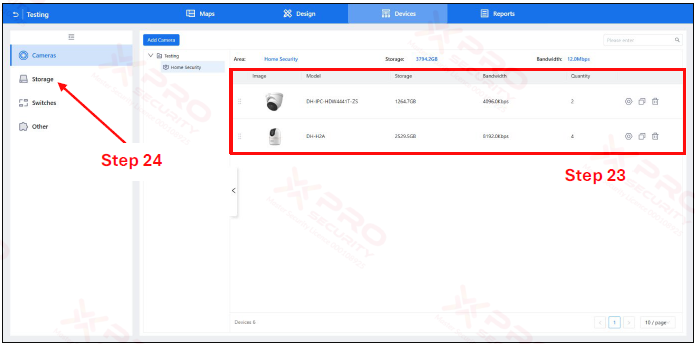
Step 23: On this page, there is a report on how many cameras you are using.
Step 24: Click on “Storage”.
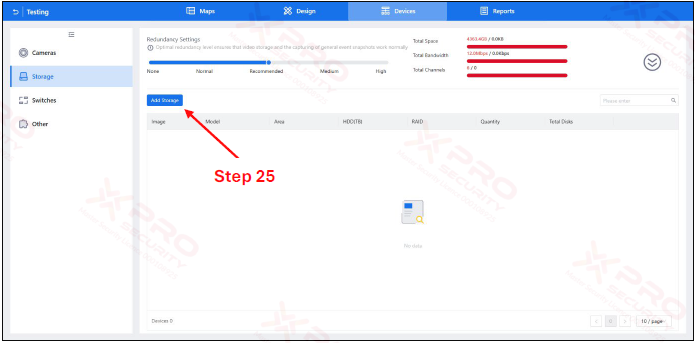
Step 25: Click on “Add Storage”.
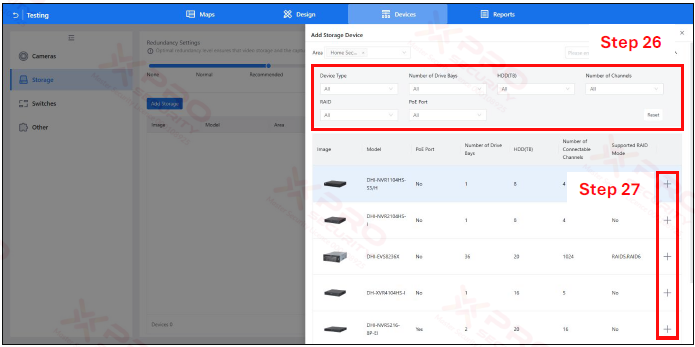
Step 26: To make it easier for you to find a suitable storage for your camera installation, you can set filters.
Step 27: Click on the “+” icon to add storage.
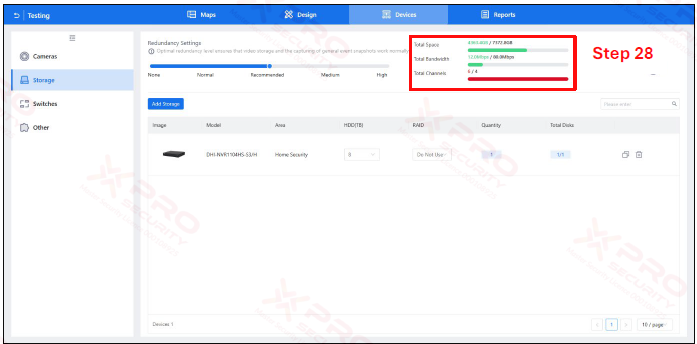
Step 28: Make sure all this information is green. The image still has a red indicator, which means that the selected storage does not match your installation. In this case, the selected storage only has 4 channels and you need 6 channels for your 6 cameras. You need to find another storage.
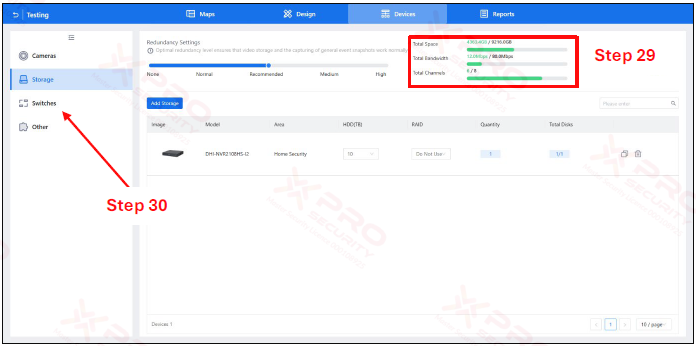
Step 29: All indicators are green, indicating that the selected storage is compatible with your camera installation.
Step 30: Click on “Switches”.
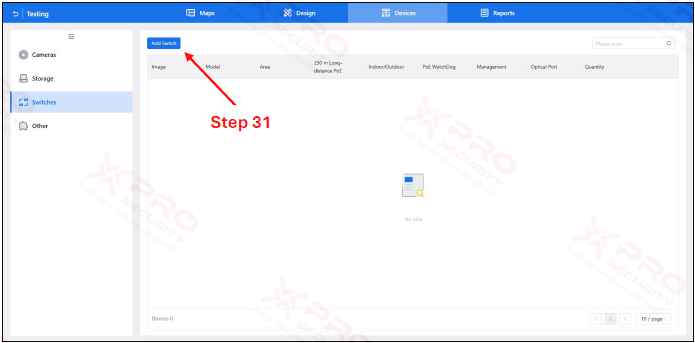
Step 31: A switch is used when the distance between cameras is very long. It extends the cable to connect long-distance cameras. Click Add Switch to add a switch.
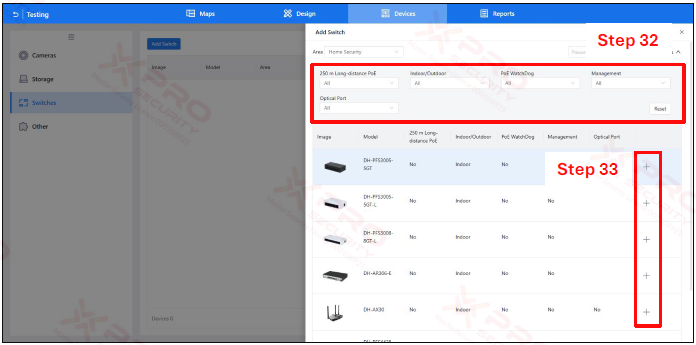
Step 32: To make it easier for you to find a suitable switch for your camera installation, you can set filters.
Step 33: Click on the “+” icon to add a switch.
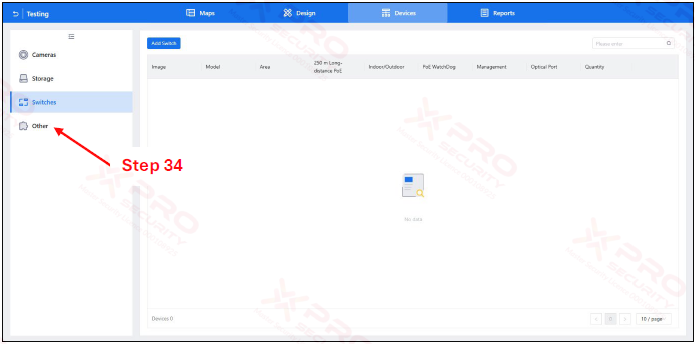
Step 34: Click on “Other”.
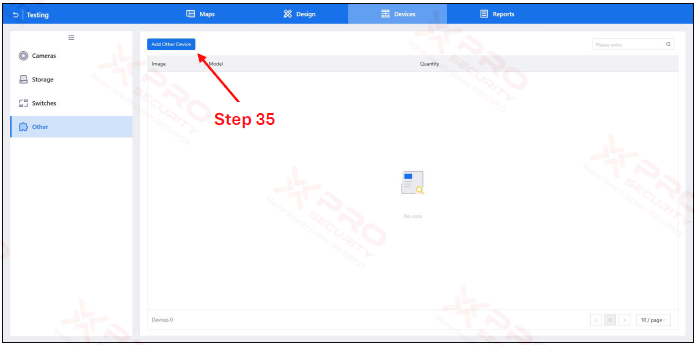
Step 35: Click on “Add Other Device”.
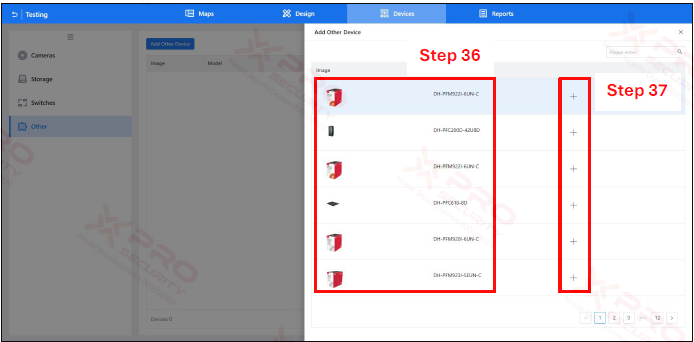
Step 36: Choose a device.
Step 37: Click on the “+” iocn to add.
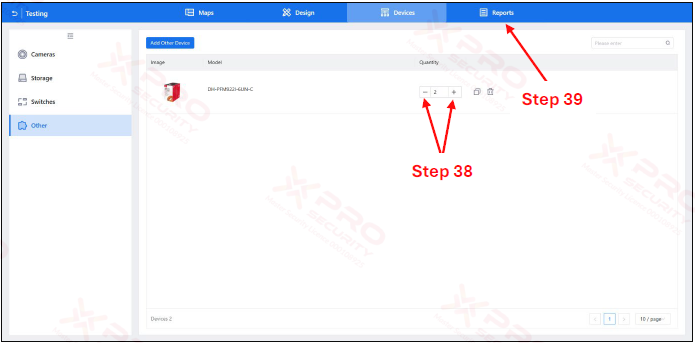
Step 38: Click + for more units and - for fewer.
Step 39: Click on “Report”.
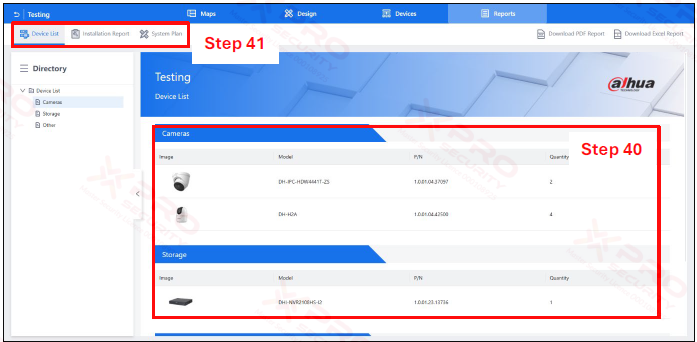
Step 40: This page is a CCTV installation report.
Step 41: Click on “Installation Report” and “System Plan” for more reports.
Contact Us Today For A Quote

Copyright © 2024 Xpro Group Pty Ltd TA/S Xpro Security