Knowledge Base
- Home
- Knowledge Base
How to Connect HikPartner Pro on HikCentral Professional and Add Device with HikPartner Pro Protocol
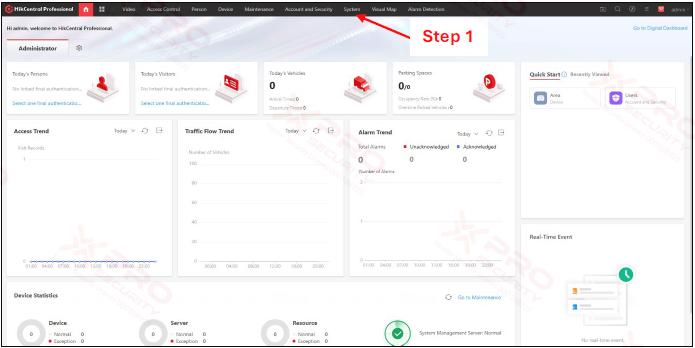
Step 1: Click on “System”.
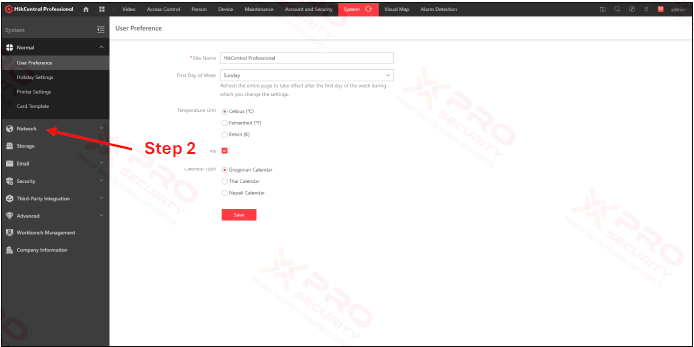
Step 2: Click on “Network”.

Step 3: Click on “Hik-Partner Pro Access”.
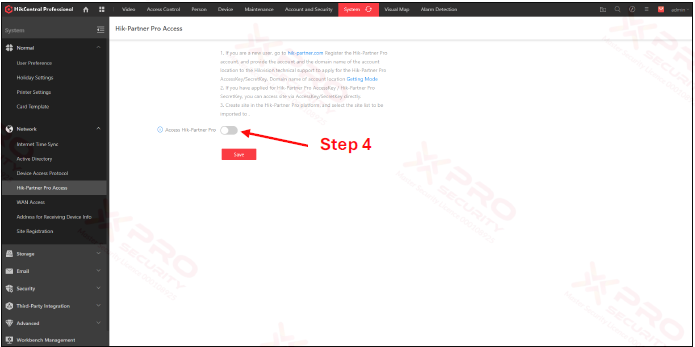
Step 4: Click the button to activate "Access Hik-Partner Pro".
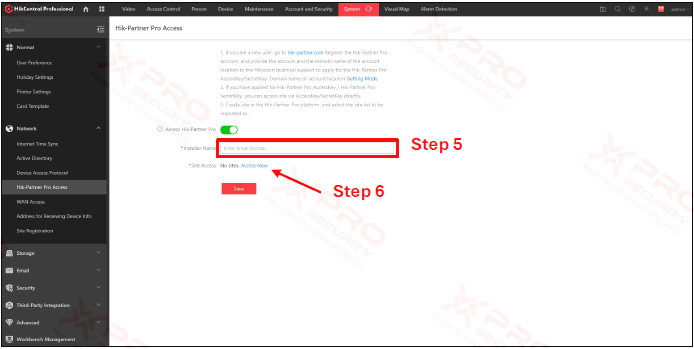
Step 5: Type in the e-mail address registered with Hik-Partner Pro.
Step 6: Click on “Access Now”.

Step 7: You need to fill in Hik-Partner Pro AccessKey, Hik-Partner Pro SecretKey and domain name. These can only be obtained in your Hik-Partner Pro account, so you need to go to the Hik-Partner Pro page first.
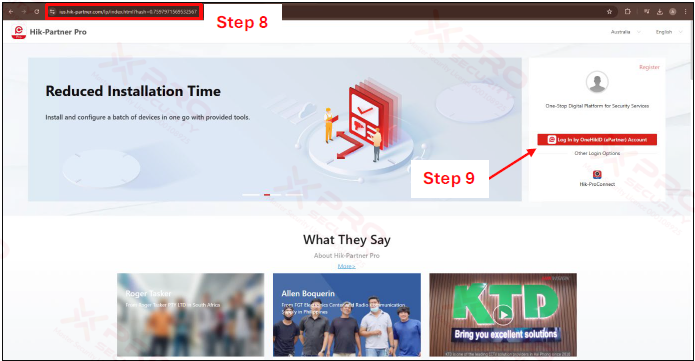
Step 8: Visit the Hik-Partner Pro page and note the domain name at the top of your browser. In the image above, the domain name is ius.hik-partner.com.
Step 9: Log in to your Hik-Partner Pro account by clicking “Log in by OneHikID”.
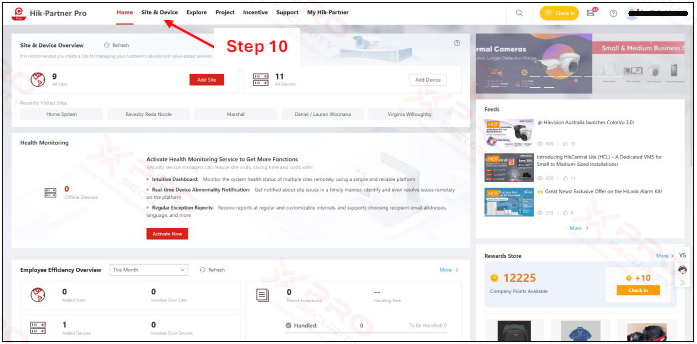
Step 10: Click on “Site & Device”.
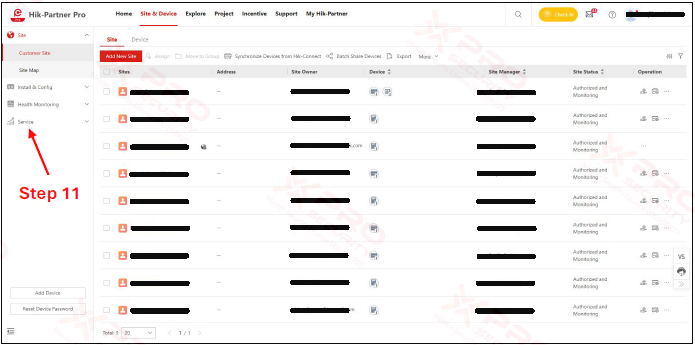
Step 11: Click on “Service”.
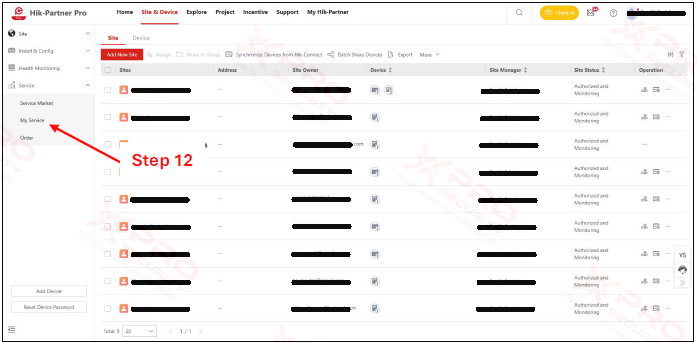
Step 12: Click on “My Service”.
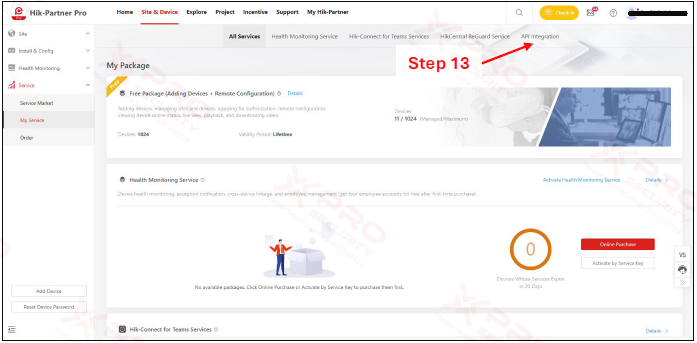
Step 13: Click on “API Integration”.
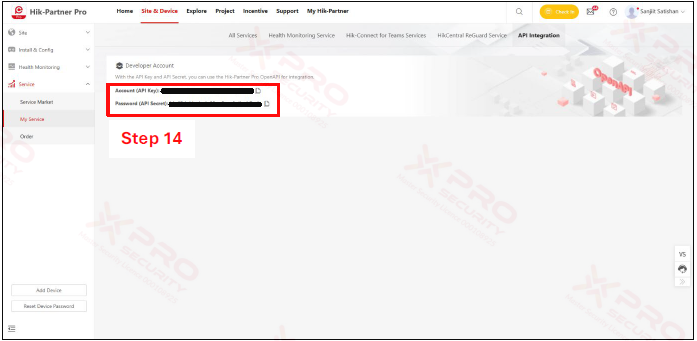
Step 14: Note both codes. Enter the API key in the AccessKey column and the API secret in the SecretKey column.
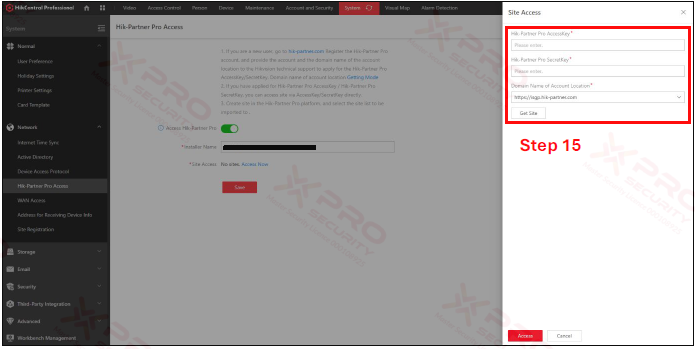
Step 15: Open HikCentral Professional again and fill in the fields based on the information from Hik-Partner Pro.
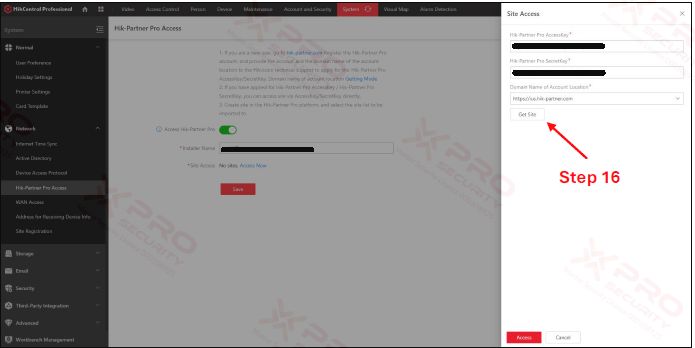
Step 16: Click on “Get Site”.
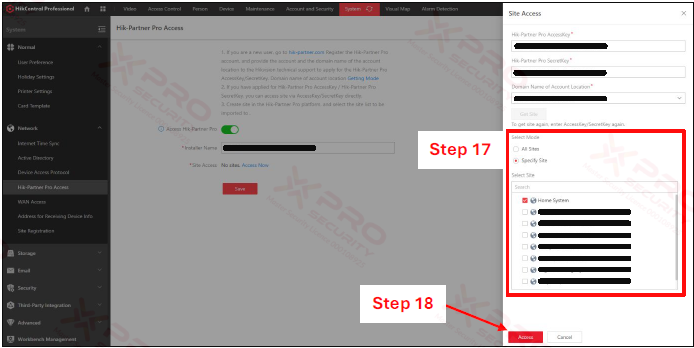
Step 17: You can select “All Sites” if you want to add all Hik-Partner Pro sites to HikCentral Professional. If you only want to add some sites, click Specify Site and select which sites you want to add to HikCentral Professional.
Step 18: Click on “Access”.
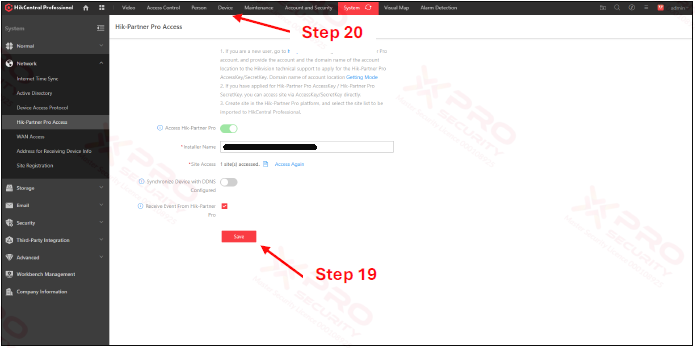
Step 19: Click on “Save”.
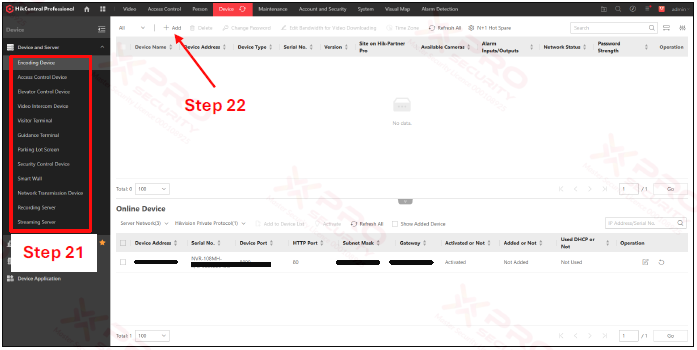
Step 21: Select the device category you wish to add. Here is an example of a Encoding Device.
Step 22: Click on “Add”.
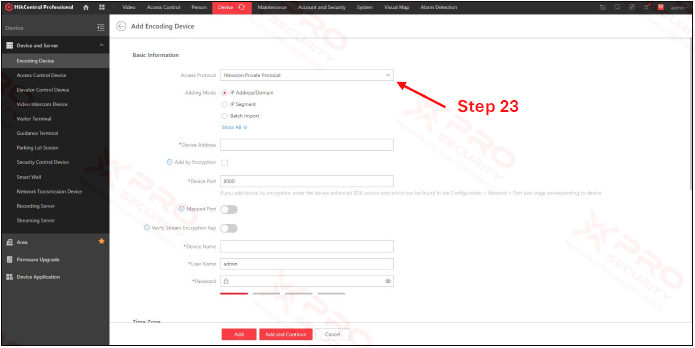
Step 23: Click on “Access Protocol”.
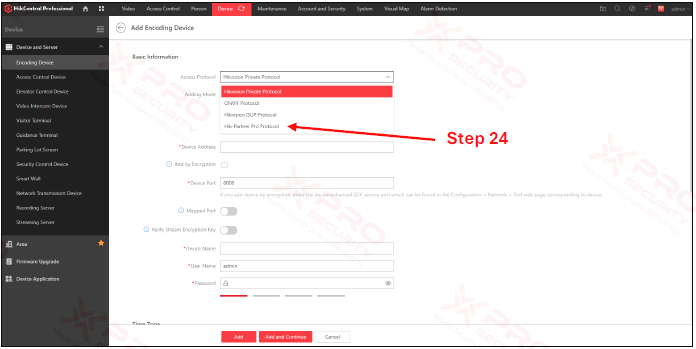
Step 24: Choose “Hik-Partner Pro Protocol”.
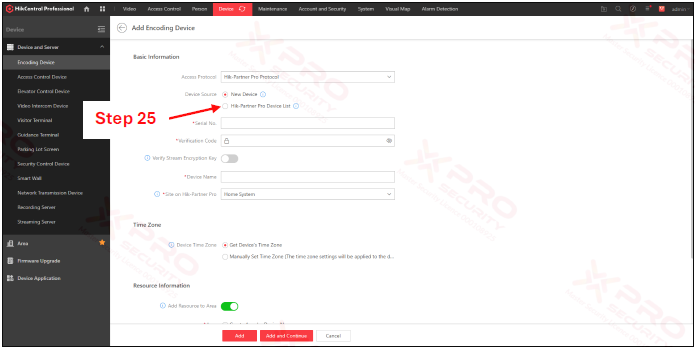
Step 25: Choose “Hik-Partner Pro Device List”.
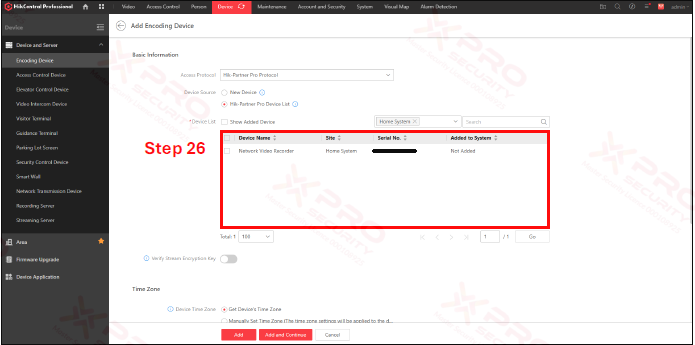
Step 26: Select the device for addition.
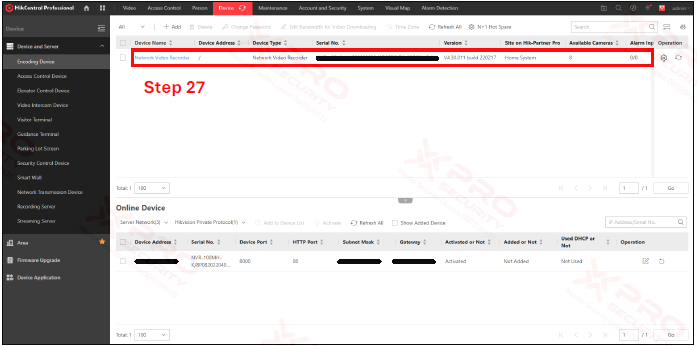
Step 27: Device added successfully.
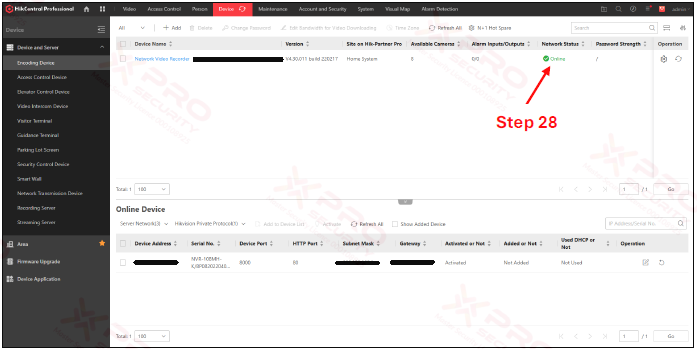
Step 28: Ensure the device's network status is online.
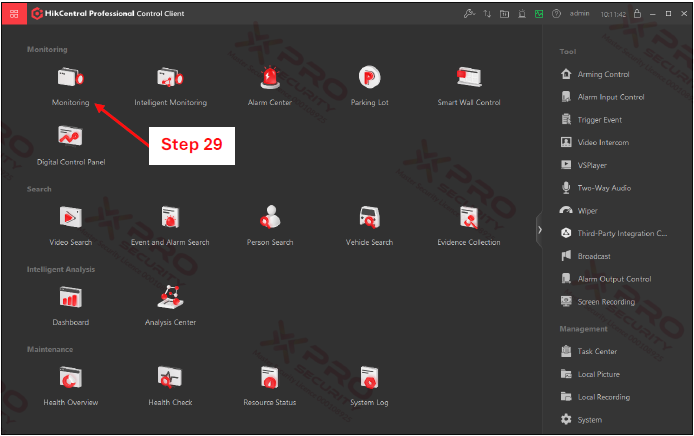
Step 29: Open the HikCentral Professional Control Client and click on “Monitoring”.
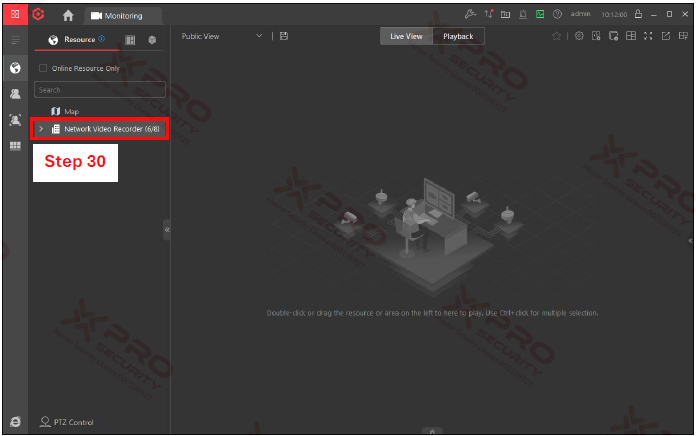
Step 30: Device also successfully logged into HikCentral Professional Control Client.
Contact Us Today For A Quote

Copyright © 2024 Xpro Group Pty Ltd TA/S Xpro Security